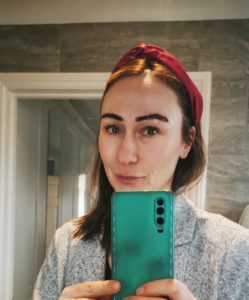
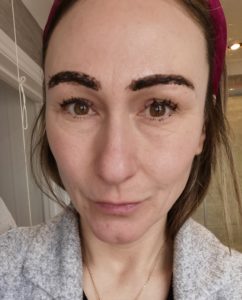
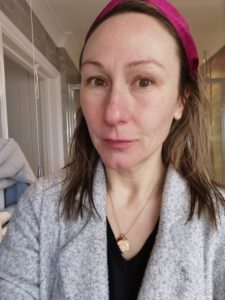
For the last few years I have noticed my brows getting more and more pathetic. I have always filled them in using a mix of brow pencil, brow mascara, brow pomade and brow pen (and breathe) and I am pretty good at filling them so they look natural-ish (I’m a trained Make-up Artist which definitely helps!), but recently I have noticed they are harder to made look good.
And then I remembered my once-in-every-six-month trick – home-tinting my brows.
You see, I plucked my brows into oblivion when I was 18. I vividly remember sitting on my unmade bed in my student house in North London, cigarette in one hand, tweezers in the other. The light was bad, most likely due to the fag smoke, I had a tiny mirror and I plucked away. I went from one side to the other and back again, removing tiny hairs whilst trying to even them up until I eventually stopped, 3 fags later. Ta-daaaaa! Kate Moss brows. It was the look. It was 1995. Problem was I looked permanently surprised and unlike KM and her dinky well-proportioned face, my brows didn’t suit me at all. When you pluck your brows that drastically, they don’t ever really grow back and based on my previous over-plucking in my Uni years I learned this first hand. Cue the shed load of brow products to draw them back in.
As we age, brows get thinner, long hairs can sprout out with NO warning and the odd grey one pops up to say hi. I am lucky that I don’t have any grey hair yet meaning my brows have stayed grey-free, but they certainly have got weedier as time has ticked by.
Drum roll…. introducing a great brow dye kit: Godefroy Instant Eyebrow Tint. Available in 5 colours. I use colour Medium Brown
Important: before you do any brow or lash dye mix a small amount of the product up and patch test behind your ear – leave for 24-hours. If you have any reaction at all (red, itchy or swollen skin) do not use!
HOW TO PREP THE BROW AREA
First, cleanse your face (brow area) – try Liz Earle Cleanse and Polish with the muslin cloth for superbly clean skin.
Next, use a cotton bud and apply a decent layer of Vaseline about 2mm above/below/side-of the eyebrows.
HOW TO APPLY THE PRODUCT
Mix the product (1 capsule of powder dye and developer cream) according to instructions in the box. Using the wooden applicator provided or a cotton bud, apply a thick layer of the dye onto and into your brow area. I like to push the product (a brown cream) right into the skin and 1mm above/below the brow hairs – to get those little fine ones.
I added the remainder of the dye onto my clean top and bottom lashes, using a cotton bud.
I left the dye on for 3-minutes. The instructions claims 1-2 mins for medium brown, but I did 3 full mins! I know I know – it was the most rebellious thing I have done in months.
I never ever use facial wipes – a big older-skin no-no. That said, I think they are effective to take the dye off. I nicked one from my 11-year old daughter, shhh – ‘wipes’ have the right amount of roughness (hence not ever using on the face) to take the dye off properly. Tissues are useless, a face-cloth ends up stained and cotton pads are a bit slimy when wet.
Remove the dye with the wipe, discard.
Wash your face again, pat dry.
Use wet cotton wool pads to gently wipe any dye from your lashes if you added some like I did.
THE RESULT
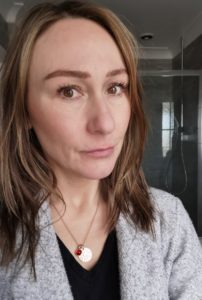
My brows are still skinny, it doesn’t change the shape – only a miracle could do that, but they are EASIER to work with when I am applying my brow make-up.
I mentioned a few of the types of brow products I use every day and have listed below if you fancy knowing a bit more about them (all products mentioned in this blog were bought by me).
Nutmeg (Morrisons supermarket) Brow Styler Pencil – brown (can’t find link online)
NYX Lift & Snatch Brow Tint Pen
Thank you for reading and do share any photos of your tinted brows with me on Instagram.
I hope to do a brow make-up video soon on insta soon, so stay tuned.
Lucy, aka Geriatric Mum x
PS always remember that brows should be sisters not twins! You’re welcome.
